Showing posts with label Miscellaneous. Show all posts

Sunday, January 22, 2012

Valentine Pretzels

Pin It


Valentine defined by Dictionary.com as - a card or message, usually amatory or sentimental but sometimes satirical or comical, or a token or gift sent by one person to another on Valentine Day, sometimes anonymously.

Valentine defined by Me - a reason to make and eat as much chocolate as possible!!

So the holiday is coming up and I thought I would make some Valentine themed sweets.  We'll see how many I get through - my list is huge, of course.  But these pretzels are easy.  Easy peasy to be exact.

Go to the store and buy a bag of pretzels, bag of Wilton Candy Melts and sprinkles.  Melt candy melts.  I use my double boiler but you can also use your microwave.  Dip pretzels in candy, sprinkle with sprinkles and lay on cookie sheet lined with parchment paper.  Wait a few minutes for candy to set and done.  Now eat!


Monday, January 9, 2012

Liebster Blog Award For Me!


I got an email the other day from Bridget at Flour & Friends, Bridget informed me that she was awarding me with the Liebster Blog Award. What a great email to get!  First I love talking to other bloggers.  I am new to blogging and I am always amazed by the blogging community.  There are so many great, friendly people out there and I love connecting with them.  I don't know if they know it - but I consider us all friends.   Second, I got an award!!!  It is so nice to know that Bridget enjoys my blog.  Makes me feel good!

The Liebster Blog Award is for up and coming bloggers who have a following list of less than 200.  Liebster is a German word that means favorite or dearest.  I feel honored that Bridget chose me to receive this award!  Now I get to share this award with five other bloggers I think deserve it.

Check out Bridget and her blog post about this award over at Flour & Friends and show her some love! She has a great blog with so many delicious recipes.  Not all sweets - which is inspiring me to try some new recipes and get out of our dinner rut!  All of her recipes look amazing!

Also check out these great blogs!

1.  The Garden of Yum - Raina has a great blog.  She does bake amazing desserts, but also so many yummy savory dishes.  I do sometimes want a break from sweet and Raina delivers.  Her Italian Beef Stew is so delicious you have to try it!

2.  Cakeballs, Cookies and More - Sue's blog's name says it all.  Cakeballs, cookies and more.  More sweets to tempt you.  Everything she bakes looks so delicious.  I don't know how she does it!  Her Christmas Sugar Cookies were so beautiful, and then there was the Chocolate Covered Bacon.  So many things to try!

3.  Lizy B - Lizy makes some of the most beautiful sugar cookies I have ever seen!  She is so talented and creative.  I love her Chanel Bag Post.  Beautiful cookies and she is funny too!  When I first tried royal icing I used Lizy's Thanksgiving Leaf cookies as a visual guide.  They were beautiful!

4.  The Sweet Swiper - Kirsten loves to bake and she has baked some pretty amazing desserts.  It is hard to choose just one.  But my current favorite has to be the Chocolate Whoopie Pies with dulce de leche buttercream frosting - wow!  I also love her Oreo Cheesecake Brownies.  I love to see what she is baking.

5.  Dreaming of White Chocolate - At Michelle's blog you will find yummy white chocolate recipes.  But also - all kinds of sweets.  I could read all day.  Especially FUDGE!!  She has a post titled My Fudge Recipe Collection.  So many different fudge recipes, so little time.  How will I bake them all?? 


What is so amazing about all of these bloggers is that they share their secrets!  I love seeing what they have baked or cooked up.  And I know they will leave me a road map so I can also be successful at it too - gotta love it.  Show them some love and go check them out - you won't be disappointed.

Congratulations, ladies! You all deserve it.  Now here’s what you gotta do:

- Choose 5 up and coming blogs of fewer than 200 followers to award the Liebster to.
- Show your thanks to the blogger who gave you the award by linking back to them
- Post the award on your blog.

Have a great day everyone!


Wednesday, January 4, 2012

Chocolate Chip Cookie Dough Dip

Pin It

OK - can you say Forbidden Love?

For my entire life I have loved cookie dough, cake batter, and brownie batter.  Loved, loved, loved.  And for my entire life my Mom has been saying "Do not eat that, it isn't safe."  Now my husband says it too.  When I was pregnant my OB told me I really shouldn't be eating it at all - especially pregnant.  Everyone is against this love of mine.  Until now!!!!

While browsing the world wide web I found a recipe for edible Chocolate Chip Cookie Dough.  My eyes almost popped out of my head, I think my heart stopped for a minute too!!  What - safe?  edible?  I needed to learn more.  So I read about 30 recipes for this stuff and was in awe.  The recipes include NO EGG, so it is safe to eat.  Not calorie free unfortunately, but safe!!

There is chocolate chip cookie dough dip, chocolate chip cookie dough (just plain - eat it!!), chocolate chip cookie dough brownies, chocolate chip cookie dough cupcakes and chocolate chip cookie dough truffles.  Needless to say, this is my first of many cookie dough recipes so get ready.

I made this for a New Year's Eve party we were going to and it was a big hit.  I didn't bring any home - much to my disappointment.  If you love cookie dough you have got to try this.  Guiltless Pleasure!!

Chocolate Chip Cookie Dough Dip  (Adapted from Marg (CaymanDesigns) at Food.com)
1/2 cup butter (1 stick)
1/3 cup brown sugar
1 teaspoon vanilla extract
1 (8 ounce) package of cream cheese, softened
1/2 cup confectioner's sugar
3/4 cup semisweet mini chocolate chips

1.  In a saucepan melt the butter with the brown sugar over medium to low heat.  Stir constantly until the brown sugar is dissolved.
2.  Remove from heat and whisk in vanilla extract.  Set aside to cool.
3.  Beat the cream cheese and confectioner's sugar for one minute - or until creamy and combined.
4.  Slowly beat in the cooled butter mixture and beat for another minute.
5.  Stir in the chocolate chips.
6.  Pour into your serving bowl and refrigerate.
7.  Remove dip from the refrigerator 20 minutes or so before serving so it can soften up.  I served it with vanilla wafers.  But some of us ate it with just spoons!  Enjoy!

This post may be shared with: Make Ahead Meals for Busy Moms - Melt in Your Mouth Monday, Clairejustineoxox - Creative Mondays, Skip To My Lou - Made by You Monday, Sweetology - Tea Party Tuesday, Crazy for Crust - Crazy Sweet Tuesday, Inside Bru Crew Life - Trick or Treat Tuesday, Mrs Fox's Sweets - Sweet Party, Junk In Their Trunk - Link It Up Wednesday, Hugs and Cookies XO - Wonka Wednesday, Food Corner - Midweek Fiesta, Something Swanky - Sweet Treat Thursday, Talking Dollars and Cents - Sweet Temptations, Happy Hour Projects - Freestyle Friday, Toys In The Dryer - Fun Stuff Fridays, Alli-n-Son - Sweet Tooth Friday, Well Seasoned Life - Sweet Indulgences Sunday


Sunday, January 1, 2012

Oreo Truffles


Happy New Year!!  I hope everyone had a great holiday season and is settling into the new year.  I can't believe 2011 is over, but I am looking forward to 2012.  I started blogging late in 2011 and I am really enjoying myself.  I enjoy the community of bloggers, all of the amazing recipes I have found, sharing my creations and failures, and all of my readers and your comments.  Thank you! 

Did you make any resolutions?  I am not really going to make any resolutions.  I won't write them down anyway.  But I would like to improve on my photography this year and I would like for my husband to finish our basement :).  The basement has been an ongoing project for several years.  I know if I would let him go down there for a month straight he would finish it but when he is home I usually want him around!

Question for you - Do you like Oreos? Stupid question right? Who doesn't love Oreos? Well, my son, Alex, doesn't but that is a story for another day. I found these Oreo truffles on the Kraft Recipes website and they looked yummy and easy- perfect combination!  I was a little apprehensive.  I have never made truffles before but this is one experiment that I loved.  Loved making them and loved eating them.  I think they came out great.  Might be the easiest recipe you come across.


Oreo Truffles

1 16 ounce package Oreo Cookies, finely crushed
1 8 ounce package Cream Cheese, softened
16 ounces of semi sweet chocolate, melted

1.  Place Oreos in a ziploc bag and crush until fine.  I used a rolling pin and then a mallet.  I need a food processor!
2.  Combine 3 cups of the Oreos and softened cream cheese. Blend using spatula or spoon until creamy.
3.  Shape into balls.  I used a small scoop to get uniform sized balls.
4.  Chill in refrigerator for 20 minutes.
5.  Melt chocolate.  I melted mine in a double boiler and then transferred to a bowl that made dipping easier.  Dip balls in melted chocolate and place on cookie sheet lined with parchment paper.  Sprinkle with remaining Oreo crumbs.
6.  Refrigerate for 1 hour or until firm.  Enjoy!!

This post may be shared with: Make Ahead Meals for Busy Moms - Melt in Your Mouth Monday, Clairejustineoxox - Creative Mondays, Skip To My Lou - Made by You Monday, Sweetology - Tea Party Tuesday, Crazy for Crust - Crazy Sweet Tuesday, Inside Bru Crew Life - Trick or Treat Tuesday, Mrs Fox's Sweets - Sweet Party, Junk In Their Trunk - Link It Up Wednesday, Hugs and Cookies XO - Wonka Wednesday, Food Corner - Midweek Fiesta, Something Swanky - Sweet Treat Thursday, Talking Dollars and Cents - Sweet Temptations, Happy Hour Projects - Freestyle Friday, Toys In The Dryer - Fun Stuff Fridays, Alli-n-Son - Sweet Tooth Friday, Well Seasoned Life - Sweet Indulgences Sunday

Sunday, December 18, 2011

Chocolate Mint Chip Oat Cookies - Frosting For The Cause

Today I am excited to guest post on the Frosting for the Cause blog, so head on over there to see the entire site and all of the women who are making a difference.!

When I stumbled upon the Frosting For The Cause blog I was inspired!  I love that by baking and sharing we are actually helping raise money and awareness.  I want to thank Paula for this amazing opportunity.  Like most people, I know several people who have been affected by cancer.  However, one holds a special place in my heart, a woman that I never met, my Dad's mom.  Even though I never got to meet her I love and feel deeply connected to her.  It is amazing how love can transcend anything, even not knowing someone.  I feel I do know her because I know my Dad.   She raised my Dad to be one of the best men that I know.  Cancer took her when my Dad was only 21 years old. 

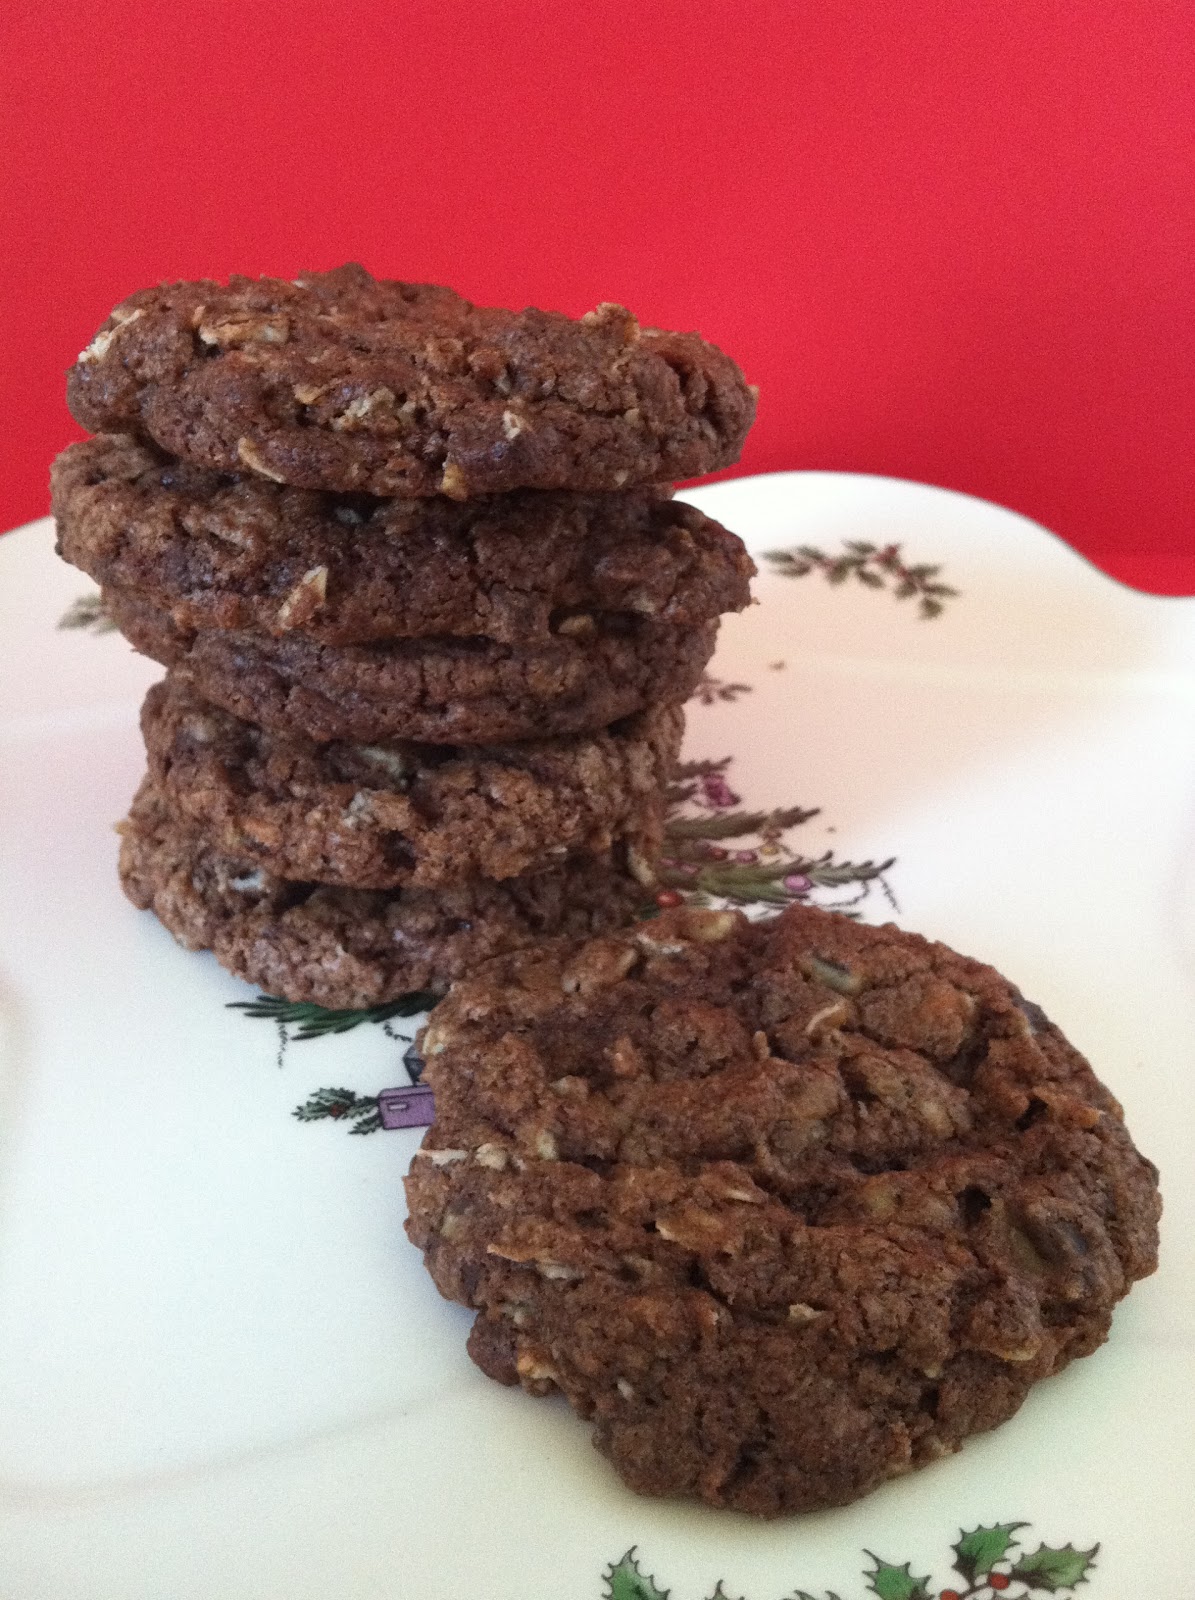
Today I am baking Chocolate Mint Chip Oat Cookies.  I love these cookies because they look a little underrated.  Maybe just some old chocolate cookies, but then you bite into them and taste the chocolate, mint and oat all at the same time.  Yum - I love it and I hope you do too!


Chocolate Mint Chip Oat Cookies (adapted from The Cookie Bible )

1 cup semisweet chocolate chips
1 cup mint chips (I used Andes Creme De Menthe baking chips)
1/2 cup butter, softened
1/2 cup granulated sugar
1 egg
1/2 teaspoon vanilla
3/4 cup all-purpose flour
1 cup uncooked oats
1 teaspoon baking powder
1/4 teaspoon baking soda
1/2 teaspoon salt (optional)

Start by preheating your oven to 375°F.  Line your cookies sheets with parchment paper.  Melt the chocolate chips in your microwave and set aside.  The chocolate can be thick and gooey.


In an electric mixer beat the butter and sugar until light and fluffy.  Then add melted chocolate, egg and vanilla and beat until combined.


Combine remaining dry ingrendients: flour, oats, baking powder, baking soda, and salt.  A little at a time add dry ingredients to the mixture and combine.


Now - stir in the mint chips by hand.  I usually don't beat them in the mixer, sometimes it breaks them down and we want them to be whole.


Drop by rounded tablespoonfuls onto your cookie sheets lined with parchment paper.  Bake 8 to 10 minutes.  Cool for only 1 minute on cookie sheets and them move to wire cooling racks.  Enjoy!


This post may be shared with:
Make Ahead Meals for Busy Moms - Melt in Your Mouth Monday
Sweetology - Tea Party Tuesday
Crazy for Crust - Crazy Sweet Tuesday
Mrs Fox's Sweets - Sweet Party
Junk In Their Trunk - Link It Up Wednesday
Hugs and Cookies XO - Wonka Wednesday
Happy Hour Projects - Freestyle Friday
Toys In The Dryer - Fun Stuff Fridays

Saturday, November 19, 2011

Turtle Bark

Pin It


My obsession with Bark continues.  I think what I love about it most is that it is so easy to make.  The hardest part is waiting for it to chill before you eat it.  I joined Danielle's at Hugs and Cookies XOXO Weekly Bake Along which you can find on her Facebook page.  This week the Bake Along was Caramel Pecan Bark - or Turtle Bark.  Yummy - I had to join!

I know the first time I made bark I used dark chocolate and decided I preferred milk chocolate.  But this recipe calls for dark chocolate so I gave it one more try - I am glad I did.  It is so delicious!

I prepared my 8x8 pan by lining it with parchment paper so the bark wouldn't stick to it.  I melted my dark chocolate chips in a double boiler and spread half of it in the pan.  Chilled it for 5 minutes and ready for the next layer which is caramel and pecans.  Is your mouth watering yet?

I didn't toast my pecans as the recipe says to do.  I love pecans the way they are and so I left them that way.  Now on to the caramel.  I was a little intimidated.  I have never made caramel or any candy and I had heard it was hard.  You must get it to a specific temperature - right?  I don't even own a candy thermometer (yet!).  But the recipe (see bottom of the post) sounded like something I could do - so what the heck!  This is an experiment you know :)

I put the sugar and water in a saucepan over medium heat and I was off.  It was a lot easier than I thought and when I was done I really did have caramel!  Much to my own amazement, not that hard!!

I don't know why the picture is sideways!!  If you know why it is doing this let me know!!


I took the bark out of the fridge, added a layer of caramel and pecans and put it back in the fridge.  One more layer of chocolate, then more caramel and pecans and voila!  You are done.  I did chill it after the final layer for quite awhile - say 30 minutes.  Which is an eternity when you are waiting to try it.  I loved it, in fact I am eating it right now :)


Turtle Bark - Recipe by Hugs and Cookies XOXO (slightly modified)

-16 oz dark chocolate chips
-1/2 cup plus 2 tablespoons pecans (separated)

Caramel Filling:
- 1/2 cup sugar
- 2 tablespoons water
- 1 tablespoon butter
- 5 tablespoons heavy cream

1. Line an 8x8 pan with parchment paper.

2.  For the Caramel Filling (You can do this!):
Put sugar and water into a saucepan over medium low heat stirring until sugar is dissolved.  Increase heat to high using the handle of the pot to give the pot a swirl to keep the mixture moving.  Do not stir directly at this point.  The mixture will start to bubble when it turns medium amber in color (approximately 5-7 minutes), add the butter and heavy cream to the saucepan.  The mixture will bubble a lot!!  Whisk to combine.  Set aside and cool completely.  Reserve 2 tablespoons for topping.

3.  Pour half of the melted chocolate into your pan and smooth.  Place pan in refrigerator for at least 5 minutes. 

4.  Remove from refrigerator and pour all of caramel except 2 tablespoons into pan.  Gently sprinkle 1/2 cup of pecans onto the caramel and press into caramel lightly with your hand.  Place in refrigerator for 7-10 minutes. 

5.  Pour remaining chocolate on top and refrigerate for 20 minutes so the bark can set.

6.  When bark is set sprinkle top with 2 tablespoons of pecans.  Place your remaining 2 tablespoons of caramel in plastic sandwich bag.  Cut small corner of bag off and drizzle caramel over pecans.  Enjoy!!!


Shared With:

Tuesday, October 18, 2011

Cake Batter Chocolate Bark


Two things I love - chocolate (of course) and other blogs about food.  I found another blog called How Sweet It Is.  As I was looking around I found a recipe for Cake Batter Chocolate Bark.  Cake batter and chocolate?  I love it!  I am always getting in trouble for eating the batter so this recipe sounded like a way for me to get what I love and not get in so much trouble.

The recipe was easy and didn't take that long.  I used a double boiler to melt my dark chocolate. 


Poured it onto a parchment paper lined cookie sheet and put it in the freezer for 20 minutes. 


Then melted my white chocolate and whisked in the cake batter, poured it on top of the dark chocolate, added sprinkles and back in the freezer for 20 more unbearable minutes!!  When it is done chilling break into chunks.


The end result was fantastic and everyone loved it.  While you are not eating it, which is hard to imagine, you must keep it in the fridge.  We didn't have that problem.  Next time we are going to try it with milk chocolate and peppermint (special request :)).

Thursday, October 13, 2011

Frosting For The Cause

I am so excited! I am going to bake for Frosting for the Cause on December 18th. Check out their website at www.frostingforthecause.com . It is an honor! And nerve racking - I am going to start practicing now :)