Tuesday, December 27, 2011

Peppermint Bark


My obsession with Bark continues!  My husband loves Williams Sonoma Peppermint Bark.  Every year I buy him some for Christmas.  It is expensive and this year we decided to make our own.  We melted 9 ounces of milk chocolate.  Poured it onto a cookie sheet covered with parchment paper and chilled it until it set - at least twenty minutes.  Then I melted 12 ounces of white chocolate and poured it on top of the milk chocolate.  While it was still wet I added crushed candy canes.  I used my fingers to push the candy canes into the bark to help it stick.  Then I chilled it again until it was set.  The hardest part is waiting for it to be finished!!  It is good, my husband says as good as Williams Sonoma!!


Other Christmas projects we worked on were....

Alex and his friend, Jack, decorated Gingerbread houses!


For a quick treat I bought fudge covered Oreos and decorated them with green candy melts.  It was so easy to decorate.  I threw a handful of candy melts into a disposable decorating bag.  Melted in the microwave - about 10 seconds.  Snipped the end off the bag and decorated.


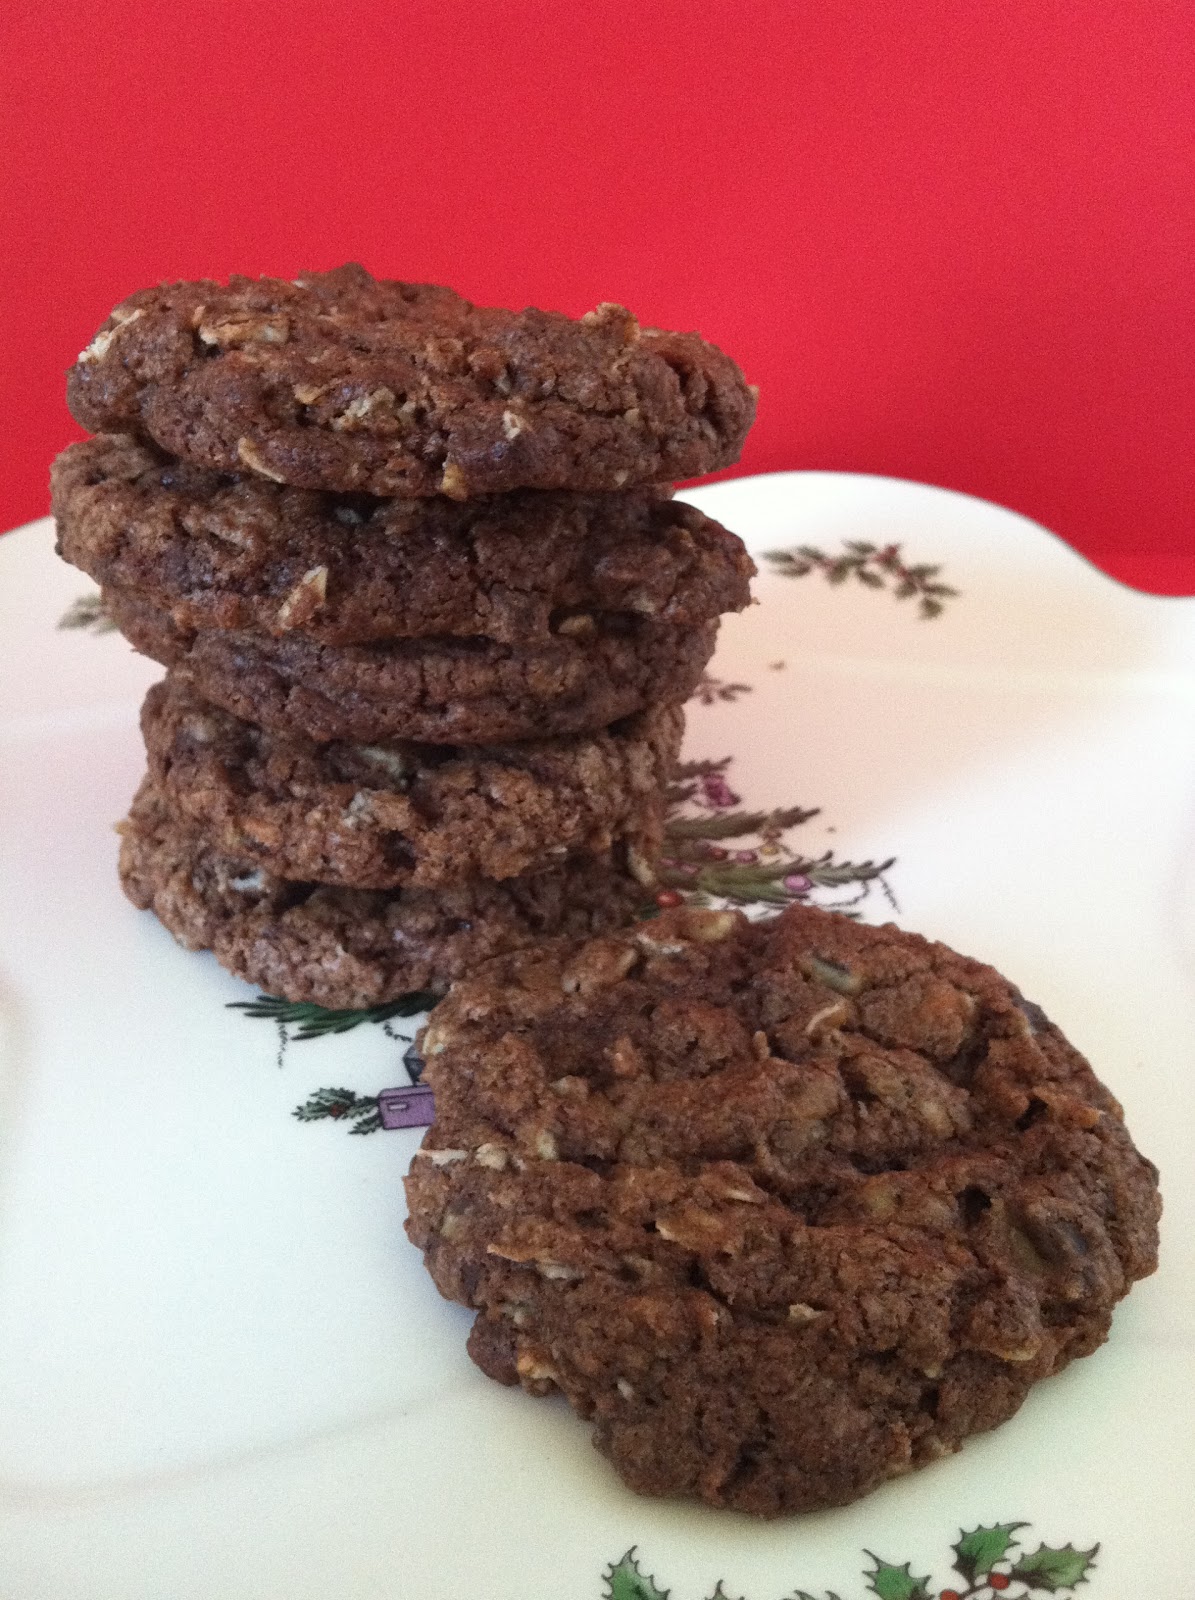
We made Nicole's from Life's a Batch's Secret Chocolate Chip Cookies which we left for Santa.  I did speak to him and he loved them.  I love Nicole's site and these cookies are really yummy!  (not sure why the picture is sideways :0)


And last but not least, Brownie Bites!  Remember the Candy Cane Kiss Brownie Bites?  I changed it up a bit.  We made them with mint truffle Hershey kisses in the center and Andes Candy chopped on top.  Yum!


And a confession - I didn't make any Christmas sugar cookies!!  Bad, bad, baker!!!  I just ran out of time.  It was so crazy this year!!  I hope you all had a great holiday season.  And that you got everything you wanted from Santa!  I got two new cookbooks that I am really excited to start baking from.  This next year should be full of lots of new experiments!!  Happy New Year!

This post may be shared with:
Make Ahead Meals for Busy Moms - Melt in Your Mouth Monday
Sweetology - Tea Party Tuesday
Crazy for Crust - Crazy Sweet Tuesday
Mrs Fox's Sweets - Sweet Party
Junk In Their Trunk - Link It Up Wednesday
Hugs and Cookies XO - Wonka Wednesday
Something Swanky - Sweet Treat Thursday
Talking Dollars and Cents - Sweet Temptations
Happy Hour Projects - Freestyle Friday
Toys In The Dryer - Fun Stuff Fridays
Alli-n-Son - Sweet Tooth Friday
Well Seasoned Life - Sweet Indulgences Sunday
JDaniel4's Mom- Christmas Traditions Link Up

Monday, December 19, 2011

Christmas Tree Cupcakes


Are you ready for Christmas?  Is your list done?  You better hurry!!!  Here is another Christmas cupcake.  Easy peasy and great for a party.  I made chocolate cupcakes, and vanilla buttercream.  I tinted the buttercream with Americolor Forest Green gel.  I piped the frosting on the cupcakes with tip 1M.  I just piped the frosting up higher to look like a tree.  I used CakeMate Celebration sprinkles for the decorations and Wilton Gingerbread House candy for the stars.  Easy and delicious!! 

This post may be shared with:
Make Ahead Meals for Busy Moms - Melt in Your Mouth Monday
Sweetology - Tea Party Tuesday
Crazy for Crust - Crazy Sweet Tuesday
Mrs Fox's Sweets - Sweet Party
Junk In Their Trunk - Link It Up Wednesday
Hugs and Cookies XO - Wonka Wednesday
Something Swanky - Sweet Treat Thursday
Happy Hour Projects - Freestyle Friday
Toys In The Dryer - Fun Stuff Fridays
Well Seasoned Life - Sweet Indulgences Sunday
JDaniel4's Mom- Christmas Traditions Link Up


Sunday, December 18, 2011

Holly Cupcakes


Are you going crazy like me??  Only 6 more days until Christmas and I still have a lot to do!  Of course I am baking a lot more now because of the holiday and will be trying to post everything this week.  I am going to keep the posts short and sweet for us :).

I saw these cupcakes on The Seven Year Cottage blog.  They are so cute and festive!  You use green gum sticks for the holly leaves and a red gumball for the holly berry.  I made chocolate cupcakes and topped them with chocolate buttercream.  I used my new large french tip to frost them.  This is the first time I used this tip and I liked it a lot.  Can't wait to use it again.  Only problem I had with these cupcakes was finding green gum!  I couldn't remember the color of the different types of gum so I tried 3 different kinds and none were that green!!  I ended up using Wrigley's Extra Spearmint which was the gum I liked the best out of the three I tried.  It wasn't the greenest, but it was the best width and color.  These were great cupcakes to bring to my Christmas party.  So festive.  Enjoy!!

This post may be shared with:
Make Ahead Meals for Busy Moms - Melt in Your Mouth Monday
Sweetology - Tea Party Tuesday
Crazy for Crust - Crazy Sweet Tuesday
Mrs Fox's Sweets - Sweet Party
Junk In Their Trunk - Link It Up Wednesday
Hugs and Cookies XO - Wonka Wednesday
Happy Hour Projects - Freestyle Friday
Toys In The Dryer - Fun Stuff Fridays
Well Seasoned Life - Sweet Indulgences Sunday
Something Swanky - Sweet Treat Thursday


Chocolate Mint Chip Oat Cookies - Frosting For The Cause

Today I am excited to guest post on the Frosting for the Cause blog, so head on over there to see the entire site and all of the women who are making a difference.!

When I stumbled upon the Frosting For The Cause blog I was inspired!  I love that by baking and sharing we are actually helping raise money and awareness.  I want to thank Paula for this amazing opportunity.  Like most people, I know several people who have been affected by cancer.  However, one holds a special place in my heart, a woman that I never met, my Dad's mom.  Even though I never got to meet her I love and feel deeply connected to her.  It is amazing how love can transcend anything, even not knowing someone.  I feel I do know her because I know my Dad.   She raised my Dad to be one of the best men that I know.  Cancer took her when my Dad was only 21 years old. 

Today I am baking Chocolate Mint Chip Oat Cookies.  I love these cookies because they look a little underrated.  Maybe just some old chocolate cookies, but then you bite into them and taste the chocolate, mint and oat all at the same time.  Yum - I love it and I hope you do too!


Chocolate Mint Chip Oat Cookies (adapted from The Cookie Bible )

1 cup semisweet chocolate chips
1 cup mint chips (I used Andes Creme De Menthe baking chips)
1/2 cup butter, softened
1/2 cup granulated sugar
1 egg
1/2 teaspoon vanilla
3/4 cup all-purpose flour
1 cup uncooked oats
1 teaspoon baking powder
1/4 teaspoon baking soda
1/2 teaspoon salt (optional)

Start by preheating your oven to 375°F.  Line your cookies sheets with parchment paper.  Melt the chocolate chips in your microwave and set aside.  The chocolate can be thick and gooey.


In an electric mixer beat the butter and sugar until light and fluffy.  Then add melted chocolate, egg and vanilla and beat until combined.


Combine remaining dry ingrendients: flour, oats, baking powder, baking soda, and salt.  A little at a time add dry ingredients to the mixture and combine.


Now - stir in the mint chips by hand.  I usually don't beat them in the mixer, sometimes it breaks them down and we want them to be whole.


Drop by rounded tablespoonfuls onto your cookie sheets lined with parchment paper.  Bake 8 to 10 minutes.  Cool for only 1 minute on cookie sheets and them move to wire cooling racks.  Enjoy!


This post may be shared with:
Make Ahead Meals for Busy Moms - Melt in Your Mouth Monday
Sweetology - Tea Party Tuesday
Crazy for Crust - Crazy Sweet Tuesday
Mrs Fox's Sweets - Sweet Party
Junk In Their Trunk - Link It Up Wednesday
Hugs and Cookies XO - Wonka Wednesday
Happy Hour Projects - Freestyle Friday
Toys In The Dryer - Fun Stuff Fridays

Monday, December 12, 2011

Brownie Bites


I saw these cute little Brownie Bites in Parents Magazine.  I have kind of been in a brownie mood and what would be better than brownies dipped in candy coating with sprinkles on top?  So off I go.

I lined my brownie pan with tin foil so that the tin foil hung over the edges of the pan (so I will be able to pull out the brownies later) and generously sprayed it with cooking spray.  Generously, aka, I soaked it.  I made my favorite boxed brownies and poured the batter into the brownie pan and baked per the package instructions.  Once they were cooled I removed the brownies from the pan by lifting the foil out.  I carefully wrapped the cooled brownies in another layer of tin foil, placed in a ziploc bag and put them in the freezer.  If the brownies are frozen they will be easier to cut.

I was planning on completing these the same day that I baked the brownies.  But something came up - I think this was the day that the school called me and told me to come get Alex because he had fallen and hurt his head.  Never a dull moment!!  No worries though he is ok and didn't need stitches.

Because the brownies were frozen I could wait until I was ready and a few days later I was so I melted my green candy melts.  The package says you can melt them in the microwave but I never have success with this method.  I always end up overheating them and then they get all thick and horrible so I use a double boiler and it works perfectly everytime. 

I took the brownies out of the freezer and cut them into bite size pieces.  I got a lot of pieces, probably about forty.  So I dutifully started dipping them in the candy coating.  I used forks to turn them and make sure they were coated.


While the candy coating was still wet I added some Christmas sprinkles.  I have to say that I did not enjoy making these :0 !  Yep I said it!!  You know this is an experiment and I can't guarantee I will like baking everything. Although I can guarantee I will like tasting everything I bake!  They tasted awesome but so much work dipping them in the candy coating - it got tedious for me.  So I am checking them off of my to bake list and moving on.  If you don't mind taking time to coat them and using forks to turn them around you would have no problem and should try them.  They did taste really good......maybe someday I will try again.  Maybe I was just tired from worrying about Alex's head!


This post may be shared with:
Make Ahead Meals for Busy Moms - Melt in Your Mouth Monday
Sweetology - Tea Party Tuesday
Crazy for Crust - Crazy Sweet Tuesday
Mrs Fox's Sweets - Sweet Party
Junk In Their Trunk - Link It Up Wednesday
Hugs and Cookies XO - Wonka Wednesday
Happy Hour Projects - Freestyle Friday
Toys In The Dryer - Fun Stuff Fridays
JDaniel4's Mom- Christmas Traditions Link Up

Sunday, December 4, 2011

Candy Cane Kiss Brownie Bites


When I saw the Picky Palate Blog I was in love!  Jenny has a lot of amazing recipes.  I didn't find her blog on my own my friend, Amy, led me to it.  She wanted me to try Jenny's Festive Candy Cane Kiss Centered Brownie Bites.  They looked so good - they had to be difficult to make right?


Nope - not too hard!  I mixed up my favorite brownie mix according to the box instructions.  I greased my mini-muffin pan thoroughly.  Then I used a scoop to fill the pan about 3/4 full with brownie batter.  The brownies I used are really yummy - but lots of chocolate chunks.  Not ideal for this recipe.  I think it would be even easier if I used a smooth brownie mix which I will do next time.  And there will be a next time soon!

Then I inserted a Candy Cane Hershey Kiss into the brownie batter of each muffin tin.  This is where the chunks made it a little difficult.  See how I couldn't always get the kisses in straight and even?  But I forged on! 


I baked them in the oven at 350 degrees for 20 minutes and let them cool completely.  I was worried because the kisses didn't go in as evenly as I hoped.  When they were done baking you could see some of the kisses poking out of the tops.


No worries though!  They are topped with a simple frosting.  And the frosting took care of my little eye sore!!  The frosting is just melted chocolate chips and heavy cream.  I used 1 Cup chocolate chips, melted them, added 4 Tablespoons of heavy cream, mixed together and then back in the microwave for 10 seconds - mix again.  I doubled the frosting recipe because we love frosting here but also because originally I only made one batch of frosting and it was not enough.  I got 40 brownie bites and that requires a lot of frosting!!  I just dipped the top of the brownie bites in the frosting.  Then as the Picky Palate suggested I crushed 3 candy canes and sprinkled them on top. You want the candy cane to be in small pieces, not dust but small bite size pieces.  I put mine in a ziploc bag and used our potato masher to smash them up (only the best baking tools are used in this kitchen!)  They taste so good.  You have to try it!


Shared With:

Crazy for Crust - Crazy Sweet Tuesday
Hugs and Cookies XO - Wonka Wednesday
Mrs Fox's Sweets - Sweet Party
Junk In Their Trunk - Link It Up Wednesday
Happy Hour Projects - Freestyle Friday
Toys In The Dryer - Fun Stuff Fridays


Saturday, December 3, 2011

Lemon Tool Birthday Cake

My husband, Rob's, birthday was November 27th.  I wanted to make him a really special cake.  Unlike me his favorite thing is not chocolate (hard to believe we ended up together!)  He does like chocolate but not his favorite.  When I asked him what flavor he wanted for his birthday cake he said lemon cake and lemon frosting.  Now I like lemon, but I wanted a cake that everyone could enjoy (like me and my chocoholic father!).  So we settled on lemon cake with vanilla buttercream frosting.  I didn't want to cover the cake in fondant because that really isn't his favorite.  So I frosted it in buttercream (recipe is below), smoothed the buttercream and did the border and decorations in fondant.  I honestly think that using fondant to cover a cake is easier than smoothing buttercream.  It is so hard to get it to look smooth and perfect.  Something I definately need a lot more practice at!

I searched on Cake Central for a lemon cake recipe.  I found one by TasteandSeeCakesAZ (modified recipe below).  I baked the cake and leveled it.  We tasted the cake that we had to trim off and it was excellent.  So I frosted it with buttercream.  I rolled out a yellow piece of fondant and cut it into a 1"thick strip.  I then used my black edible marker from Americolor to draw on the tape measure. 


I also have a tool candy mold so I colored fondant and pushed it into the mold to make tools for the top of the cake.  Only problem I had is that I had to make and eat the cake in one day.  The fondant tools could have really used more time to dry out and harden. 


I have also heard that gumpaste would be good for this type of decoration.  But I don't know anything about that yet.  I need to add it to my list of future experiments.  Other problem with doing the cake in one day is that I had to take the pictures at night when it was finished and with no natural light.  So bear with me :)

The cake came out ok and Rob loved the lemon flavor.  Very suprisingly so did my Dad!!!   I really wanted this cake to be spectacular since it was for Rob's birthday.  At first it was going to be a tool box cake, then a cake in the shape of a drill.  I really just ran out of time.  It was so hectic here.  I did learn a very important lesson though and that was to leave myself enough time and to plan out your cake.  Believe me, having a plan is essential and will save you a lot of stress!


Buttercream

2 sticks (1 Cup) plus 4 tablespoons butter, softened.  I use unsalted butter.
4 cups powdered sugar
2 teaspoons vanilla extract
4 teaspoons hot water

-Beat butter and sugar with an electric mixer until smooth.
-Add vanilla and hot water and beat again until smooth.

Makes enough to cover 24 cupcakes or one cake.

Lemon Cake

1 1/2 cup sugar
1 stick (1/2 cup) butter
1 box (3.4 oz) instant lemon pudding
1 teaspoon lemon extract
2 teaspoons vanilla extract
1 cup sour cream (8 oz)
zest of 1 lemon
4 eggs
2 cups all purpose flour
2 teaspoons baking powder
1/4 teaspoon salt (optional)
3/4 cup whole milk

-Cream butter and sugar in electric mixer on medium high until smooth.
-Add pudding, lemon and vanilla extracts, lemon zest and sour cream and combine.
-Beat in eggs one at a time.
-In a separate bowl combine remaining dry ingredients.
-Alternate adding dry ingredients and milk a little at a time until all is combined.
-Bake in greased cake pan at 350 degrees until done, about 30 minutes.
-Cool in pan for 10 minutes.  Finish cooling on drying rack.  Frost when completely cool.